Related Articles


When you think about love, what images come to mind? For me, above all else it’s the people I love. And with that comes about a bazillion photos of family, friends, places, pets, and so on.
So start sorting through those photos, pick out your very favorites, and let’s create a photo wall. The number of photos d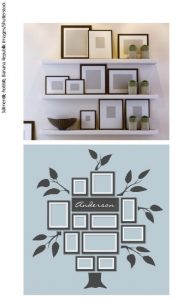 epends on the space you have and the frames you choose. It’s best to start with fewer photos because you can always add to your wall; it’s much harder to pare down after getting carried away framing 100 of your favorite photos. Start with a nice even number like eight or 10 for a medium-sized space.
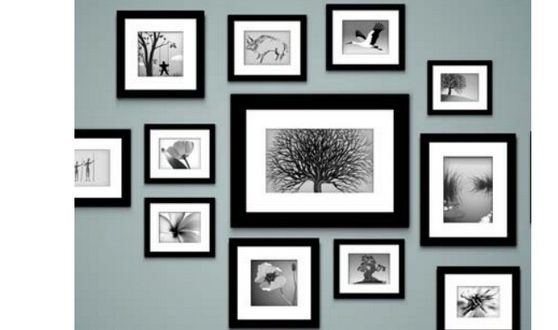
Now choose frames. I like to mix frames. Vintage frames with new frames. Gilded fancy frames with modern streamlined frames. Gold frames and white frames. Pick what works for your décor, what appeals to you. Whatever you choose, I do recommend a variety of sizes for interest sake. You could also go frameless and have your photos made into canvas art. Most photo stores do this for minimal cost. (If you are really adventurous, you can have your photos made into wallpaper and wallpaper a wall in your home. I personally like to move things around too much to commit to wallpaper.)
After you have chosen your method of framing and have gathered your hanging supplies, I suggest laying your frames out on the floor before putting a nail in your wall. This way, you get an idea of how it will look, and you can move them around before you start putting holes in your wall. Some blogs will suggest cutting out paper shapes of your frames and taping them to your wall before hanging a single photo; and to them I say, “Congratulations on having more time in your day than I do.” The floor works for me, and it will work for you.
Start in the middle and work your way out. I suggest hanging your photos closer together rather than farther apart. Farther apart tends to make your photos look like they are floating away from each other rather than working together to create the photo wall. Also consider adding non-photo items to your wall for visual interest. Items like a large monogram, a beautiful plate from your auntie’s collection, Grandma’s glasses with the rhinestones in the corners, or a pair of antlers.
If hanging photos seems too intimidating, try photo ledges. You’ll have fewer holes in your walls, and it’s easy to change the photos and frames and items going on the ledges. When arranging photo ledges, don’t be afraid to layer smaller frames in front of larger frames. Photo ledges look best full and asymmetrical.
Another creative alternative to a photo wall is to paint (or hire someone to paint) a tree trunk and branches on your wall then add small frames of family members in the branches to create your family tree wall.
Whatever you decide, there is a plethora of ideas on Pinterest® for creating photo or gallery walls. Your new wall will give your home warmth and personality. So what are you waiting for? Get those photos out of the closet, blow off the dust, and start framing and hanging!